For those of you who haven’t come across it before Bio-Linux is an operating system set up for bioinformatics with a huge number of programs pre-installed. It can be obtained (for free) from the NERC Environmental Bioinformatics Centre. I’ve spent quite a while recently messing with installations of software packages and wanted to see how everything would work in a pre-installed environment. You can obtain a USB drive from NERC and boot from that, but it doesn’t work for OSX. Also, I wasn’t sure that I wanted to reboot each time as I may need to flip backwards and forwards between applications in Bio-Linux and OSX. Here I document a few experiments with installing and running Bio-Linux within OSX (so I don’t have to re-boot) using VirtualBox.
Here are a few choice quotes about Bio-Linux
Bio-Linux 6 packs a wealth of bioinformatics tools, scientific software and documentation into a powerful and user-friendly 64-bit Ubuntu Linux system. Download Bio-Linux today and turn your PC into a powerful workstation in minutes.
Bio-Linux 6.0 is a fully featured, powerful, configurable and easy to maintain bioinformatics workstation. Bio-Linux provides more than 500 bioinformatics programs on an Ubuntu Linux 10.04 base. There is a graphical menu for bioinformatics programs, as well as easy access to the Bio-Linux bioinformatics documentation system and sample data useful for testing programs. You can also install Bio-Linux packages to handle new generation sequence data types.
FYI: I’m running OSX 10.6.8 (Snow Leopard) on a MacPro with 4GB RAM and 2x 2.8GHz Quad-Core Intel Xeon processors. The list below is going to take >1 hour.
Here’s what I did to install
- Download and install VirtualBox from http://www.virtualbox.org/wiki/Downloads
- Download Bio-Linux6 (2.2 GB) from http://nebc.nerc.ac.uk/tools/bio-linux/bl_download. Since this is a free, supported, software paid for by the UK taxpayer it would be really great for NBAF-W if you registered so that they can say ‘X people have downloaded this software’. Also please cite the paper (Field et al 2006) when you can.
- Open VirtualBox and click “New” from the toolbar. Follow the installation Wizard.
- Give your virtual machine a name like “BioLinux”, choose Linux as the operating system, and select Ubuntu 64 bit as the version.
- Select the amount of RAM to give it- 1024MB should be OK, 512MB the default could be a bit mean. More RAM is always better, especially if you are going to set it to do a lot of hard work. This can always be changed later.
- Virtual Hard Disk- use the defaults (create new), and again on the next screen (VDI).
- Virtual disk storage details. “Dynamically allocated” is the default and I used this first time out. I suspect that it was the cause of slowness though and changed to “Fixed size” next time through. Certainly if you go for Dynamically allocated make sure to give it enough space on the following screen.
- VD file location and size- I used 8GB and Dynamic first time through and it was immediately short of space after I did a system update. I would definitely choose 16GB if you have the space on your HD. When I compared the two this 16GB fixed size felt much faster.
- The next screen is a summary and now you can press “Create” to create your virtual disk. If you have chosen “Fixed size” it will take a little while to create this virtual disk (5-10 mins) but will likely run faster in the future. At the end of the process you come back to exactly the same summary screen as at the start, with no indication that anything has happened. If you press the “Create” button again though it immediately updates to show you your new virtual disk in the VirtualBox Manager window.
- You can now press the Green Start arrow in the toolbar to launch it. You will now get a “First Run Wizard”.
- Select Installation Media. Now is the time to select the operating system that you specified in step 4, ie point it towards your download of BioLinux. If you click on the little folder icon to the right of the drop-down menu you can select your BioLinux file. Use the dropdown in the file list window to select “RAW (*.iso *.cdr)” as your BioLinux is an .iso file. Check your downloads folder to locate it. At this point it is very easy (I did it 4 times across 2 installs) to click on something that causes the screen to freeze and bleep whenever you click on anything. The Esc key solved this for me. Be careful where you click! When you have selected the file you should be back at the Select Installation Media dialog with bio-linux-6-latest.iso now selected. Continue.
- The next screen claims that you are installing your file from CD/DVD, ignore that, you know the truth. Click Start.
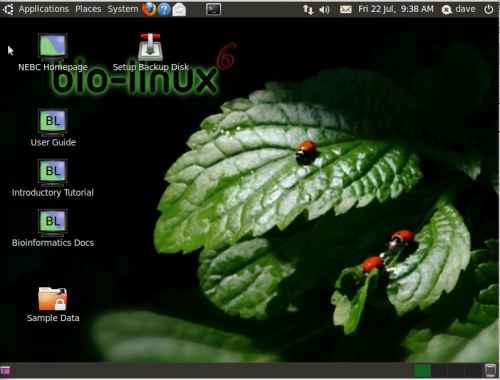
- You should now get an Ubuntu window and wait a couple of minutes before it boots and you see the BioLinux desktop and the install window.
- Choose your language and “Install Bio-Linux 6” at the bottom. Don’t click on “Try Bio-Linux”. Then select time zone.
- Keyboard layout “Choose your own” then select “United Kingdom Macintosh” from the right panel.
- Accept the defaults, then add your name and password. I set it to log in automatically here.
- Now click INSTALL. Almost done. It will take a few minutes to install, go and have a coffee.
- “Installation complete- you need to restart the computer.” This refers only to the virtual computer. Restart. “Please remove the disc and close the tray (if any) then press enter”. This is because the software still thinks you are installing from a DVD. Ignore it, and press enter, Ubuntu Bio-Linux will boot.
- You should probably set a network proxy: System –> Preferences –> Network proxy. Similarly you might want to use the “Ignored hosts” tab to exclude your university domain “*.hull.ac.uk” in my case
- You might want to update the system software. System –> Administration –> Update manager.
- You might want to go to the VirtualBox Manager window and click on Shared Folders. Then add a folder from your HD where you want to keep data accessible to both operating systems. I set mine to Auto-mount when I log in. I don’t think this works until you have restarted Bio-Linux.

I was struggling to find mention of BioPython in the documentation and list of installed software, maybe that was just me. Anyway the BioPython installation docs give a set of tests that everything is installed OK, and these work just fine in BioLinux 6, so BioPython must all be pre-installed. Excellent.
http://biopython.org/DIST/docs/install/Installation.html#htoc32
LikeLike
Thanks for this. I followed the instructions exactly – I even had a coffee at step 17 – and now Bio-Linux is up and running.
LikeLike
Glad it all went smoothly. Enjoy!
LikeLike
Thanks for posting this Dave,
I was getting stuck on step 11 having selected the wrong item initially. This helped me get back on track.
LikeLike
thanks
LikeLike
Thanks for this helpfull tutorial. Now I finally can use ARB !
LikeLike
I tried this with Bio Linux 7 up to step 10 there is no problem. Then I select the iso file to install it doesnt follow your schedule. “This computer has no detected operating systems. What would you like to do?” (1) Erase disk and install Bio-Linux or (2) something else (You can create and resize partitions yourself or choose multiple partions for Bio-Linux. Didn´t feel like pressing option 1 so I tried 2, “device for boot loader installation: dev/sda ATA VBOX HARDISK (32.2 GB). I did select to make a 30 GB VDI so I guess that is it. Runs “install now” Error message “no root file system”. Do you know how to solve this? Can I run Bio-Linux 7 on VBOX?
LikeLike
Hi, I’m getting this error message on booting (step 13) : “This kernel requires an x86-64 CPU, but only detected an i686 CPU. Unable to boot – please use a kernel appropriate for your CPU.”
Here’s my computer info:
Processor: Intel(R) Core(TM)2 Duo CPU E7400 @ 2.80GHz 2.79GHz
System type: 64-bit OS
And I have the latest VirtualBox and Extension pack.
Do you know how to fix this? Thanks
LikeLike
I had to Enable Intel VT-x/AMD-V from the BIOS.
LikeLike
Thanks Jan, I tried this and I still get the same error message…
LikeLike
That did it for me I dont know what else it can be. I guess you have to do some extensive googling and see if someone has a solution or install “real” bio-linux. I have both VM Cloud Bio-linux so I can easily swap between Win and Bio-linux but I also have Bio-Linux 7 which I boot and use for some analysis (VM gets a bit slow for larger datasets). Its easy to install next to Win.
LikeLike
Hi Sylvie, Jan, sorry but I’ve not had chance to install Bio-Linux 7 yet as a VM so I can’t really say whats going wrong. I’ll ask around though.
LikeLike
Hi,
I tried running BioLinux 7 on VirtualBox but get the following error:
“This kernel requires an x86-64 CPU, but only detected an i686 CPU. Unable to boot – please use a kernel appropriate for your CPU.”
Any suggestions on how to fix this?
I tried to go through BIOS to enable virtualization but I can’t find the option.
LikeLike
Thanks a lot for the detailed description on how get Bio-linux via VirtualBox. It saved my day (or probably year…)
LikeLike
I used biolinux 8.03 and there are NO bioinformatics programs on the desktop or anywhere else. Where is the software that is supposed to run on the ubuntu linux in biolinux???
LikeLike
Dave, your guidelines are very useful. For reference, I used them to make some screenshots that show how to import Bio-Linux on a Mac or Windows machine using VirtualBox.
Click to access BioLinux_VM.pdf
LikeLike
Excellent PDF Habil, very clear. My blog post is getting a bit old now, so I’m glad you have more modern installation instructions linked here.
LikeLike
Hi
Nice tutorial. Thanks.
Suppose I have few software which is not part of Biolinux. So I installed them separately inside Biolinux guest OS. Now I want to recreate a ova file with “Biolinux+new software” so that in other systems i can directly use the modified biolinux rather each time installing additional softwares separately.
Can u guide? Thanks
LikeLike